

How To Install Bevel Back Weatherboards
Bevel-dorsum weatherboards are back in vogue, but at that place's a lack of experienced installers.
This has led to some poor installations, so here are the key pointers to getting it right
B evel-back timber weatherboards have been used on New Zealand buildings for more than than 150 years. The first boards were simply foursquare inch-thick planks that were installed horizontally, with the upper lath overlapping the lower.
In the intervening years, the boards acquired the profile we meet today, but in essence, they accept inverse very lilliputian.
Return of bevel-back weatherboards
Every bit is common with many claddings, there have been periods when the bevel-back timber weatherboard was popular, similar the 1920s (run across Figure 1) and 1940–50s, before fading from popularity.
Since the leaky edifice crisis, there has been a marked resurgence in the popularity of bevel-back timber weatherboards, particularly when installed over a drained and vented crenel.
Inexperience leads to poor installation
This resurgence has highlighted a shortage of tradespeople experienced in bevel-back timber weatherboard installation. Contempo issues with installation include:
- Non effectively sealing cut ends, notches and holes in boards.
- Double nailing of timber boards.
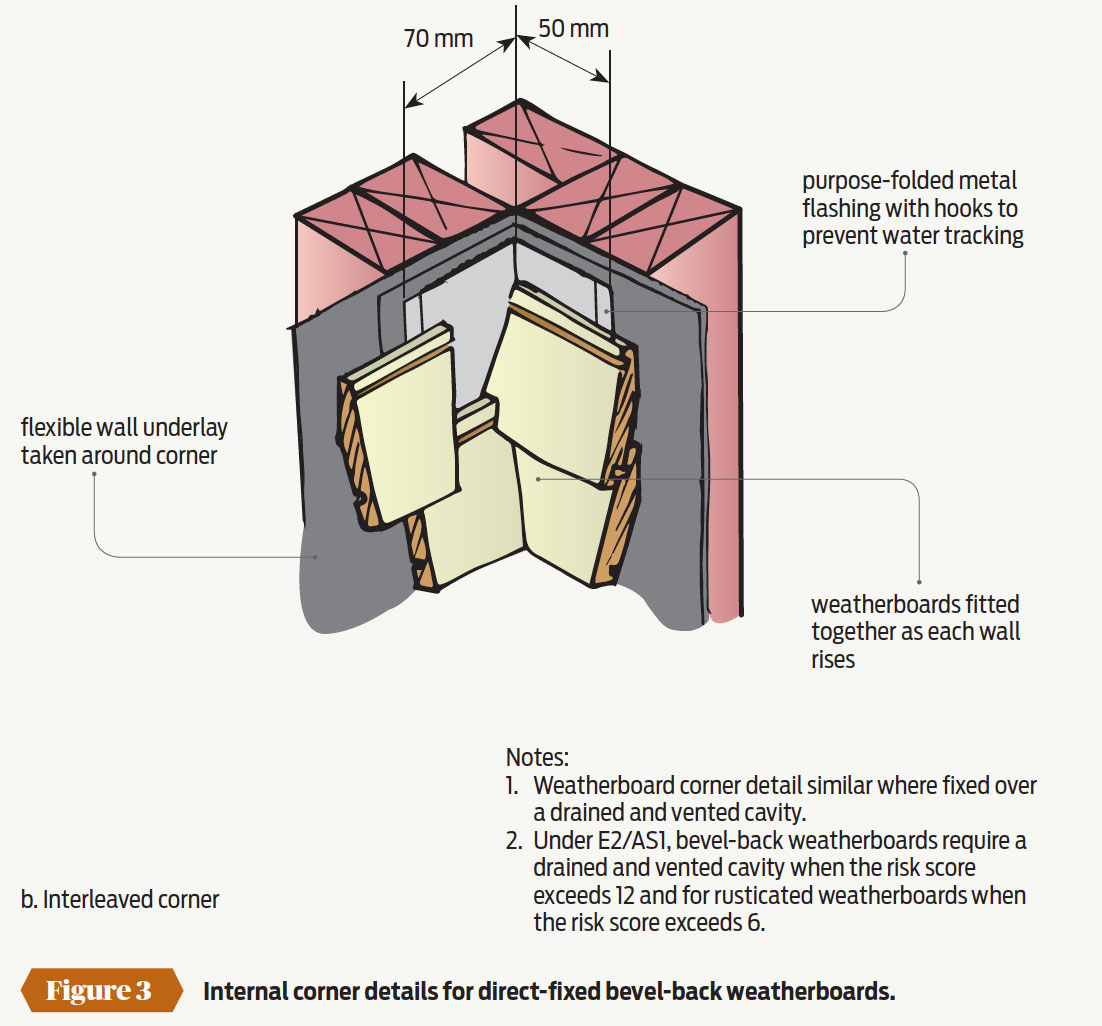
- Poor-quality cut of mitres to external corners and omitting soakers or backflashings or mitre joints opening upward as a result of timber movement.
- Wrong installation sequence at internal corners.
- Sealing of the board laps – this is not recommended equally information technology restricts drainage and drying.
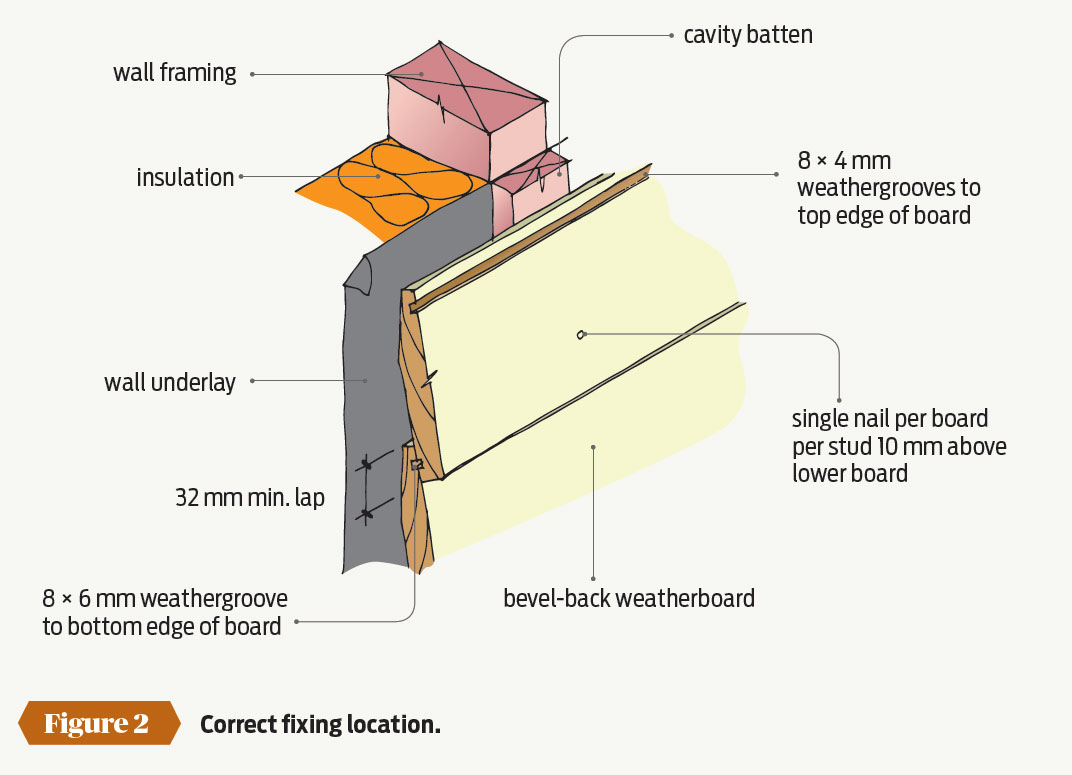
The correct method
Figure 2 gives the correct fixing location. This is a single blast to each board located simply above the lap.
Guidance for the installation of timber weatherboards is given in E2/AS1 section 9.4 and in the following BRANZ publications:
- Skillful Do Guide: Timber Cladding (tertiary edition)
- Business firm Building Guide (tertiary edition)
- Renovate: Bungalows

Attention!
Are you a building contractor who pays levy fees through a consent authority ? If so, and then you lot are entitled to a gratis subscription of BULID magazine from BRANZ. Simply email publications@branz.co.nz to bank check that you run across the required criteria and get your subscription.
Receive 30% off Skillful Repair Guide
There are sixteen titles in this essential Good Repair Guide serial, which are now available in electronic or hard re-create format. Presented as a box set or individual titles, these Repair Guides are packed with easy-to-read drawings and photos. They provide useful data for the DIY homeowner and edifice professional with practical easily-on communication on how to repair and maintain common problems in New Zealand homes.
Book box set $336 + $8p&p I Books $21 + $8p&p I Book $eighteen
Visit branz.nz/grg or phone call 0800 80 80 85 (Press2) and use promo code GRGPM (offer expires 31 December 2022. Disbelieve excludes ebooks)

Source: https://underconstruction.placemakers.co.nz/bringing-back-the-bevel/
Posted by: moorewhor1988.blogspot.com
0 Response to "How To Install Bevel Back Weatherboards"
Post a Comment